Assignment 2: Creating a Parametric Model using a Grasshopper Definition
Assignment Details
Create a parametric model using a grasshopper definition. Using your model, design parts to be laser cut that can be clipped together. At least one of your parts should enable you to connect one of your pieces to another without use of glue or fasteners. Your grasshopper definition should allow you to vary the thickness of your materials, and also vary other design parameters. Include notes in your grasshopper definition so it's clear what a user should input and bake.
Laser cut your parts and construct your physical model. Your physical model should contain at least 30 parts.
Phase 1: Ideation & Sketching
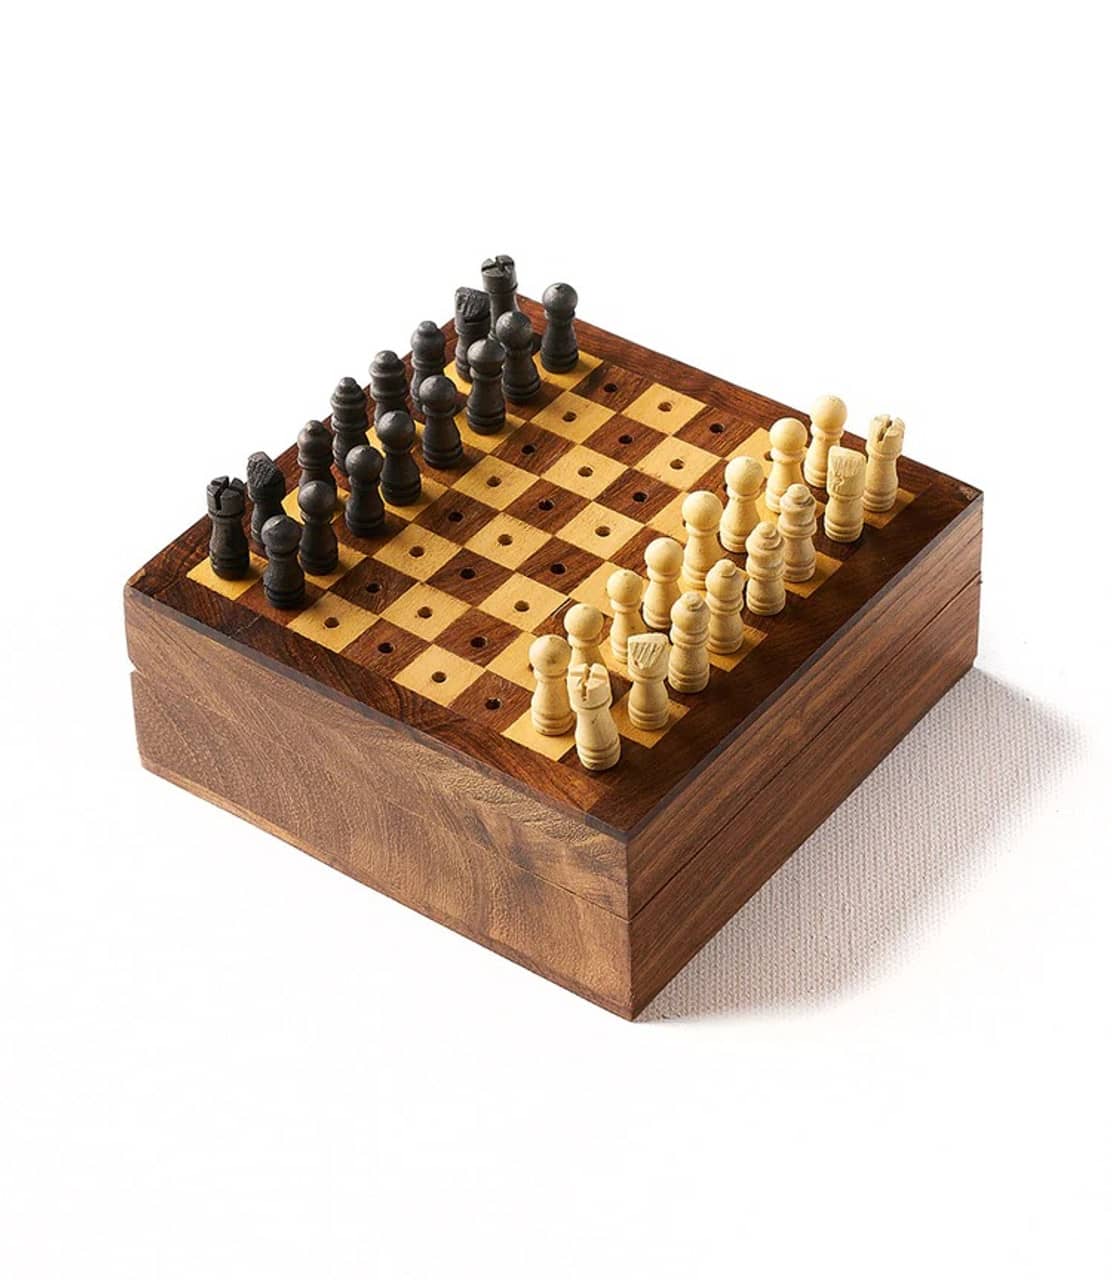
I must be one of the few people on this Earth that has not watched Queen's Gambit until now. Inspired by the Netflix show, I wanted to challenge myself and make a chess set out of laser-cut cardboard. Something like this inspiration photo I found with slots to make sure the pieces don't fall over during gameplay.
To be fair, I am not the best chess player, but I think my older brother would greatly appreciate my effort into making this!
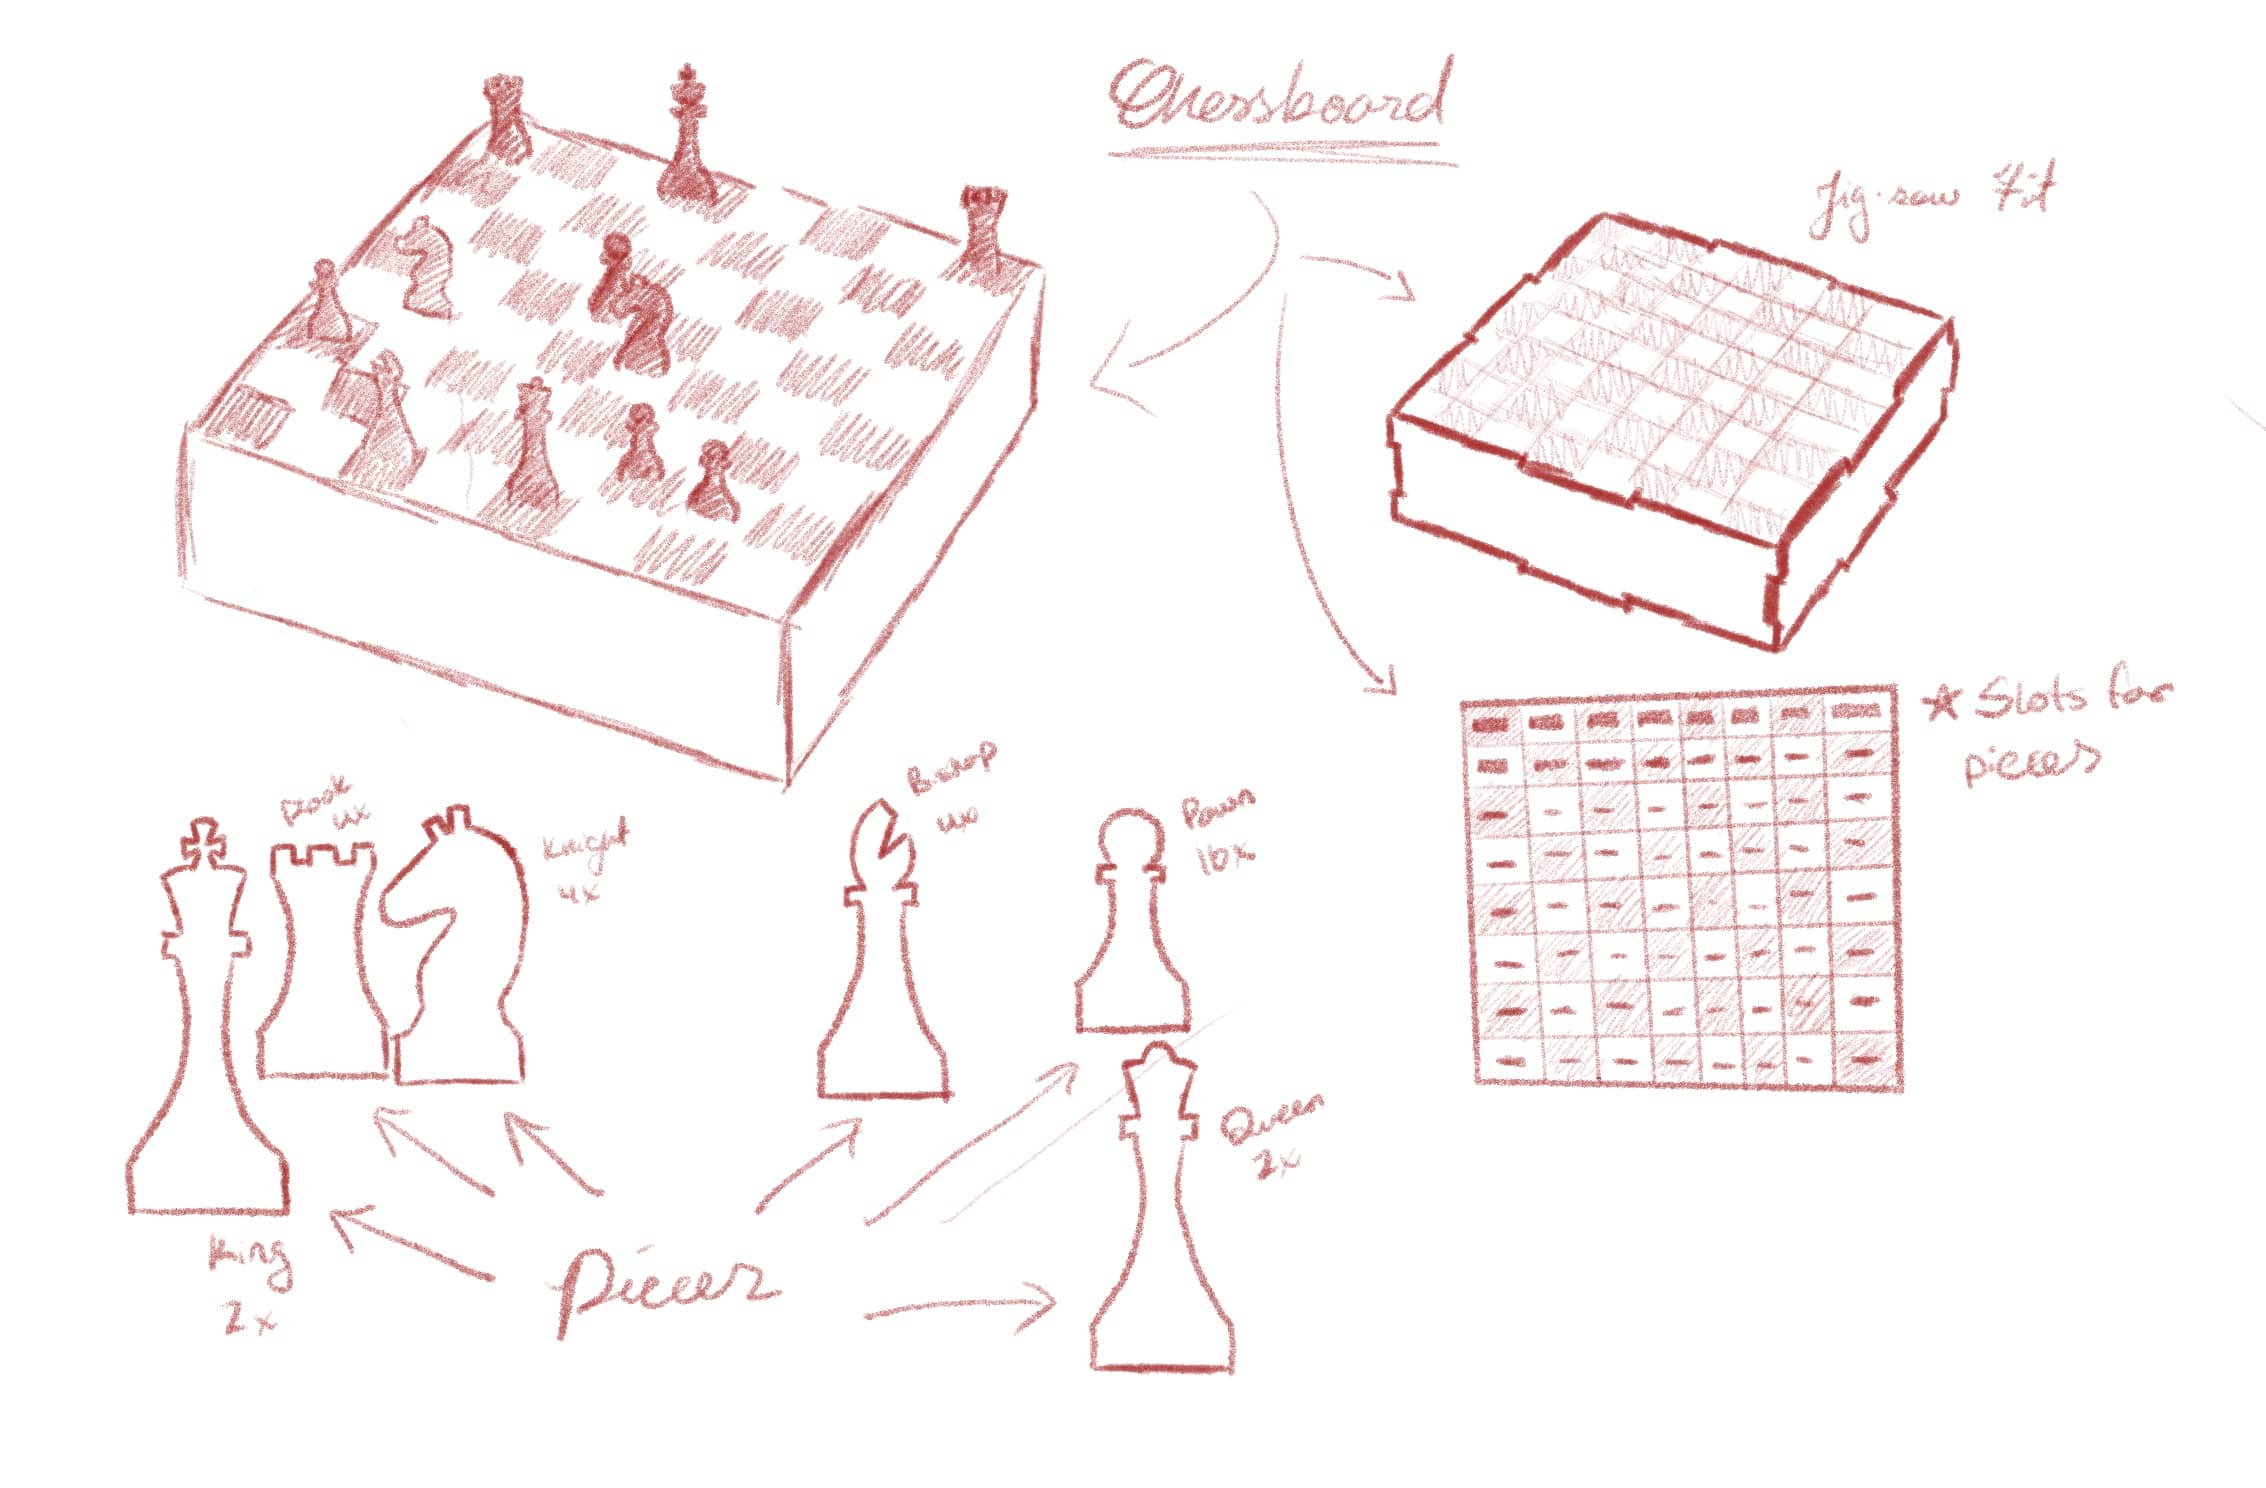
As with all of my projects, I like to start with a general sketch of my idea and the overall concept of what I would like to make.
Here, I decided to make the chess box itself a jigsaw box that fits together so the pieces can be stored inside the box. I also made a note to make slots in the pattern so my chess pieces can slot in and stay upright during gameplay.
Phase 2: Grasshopper Definition & Vector Creation
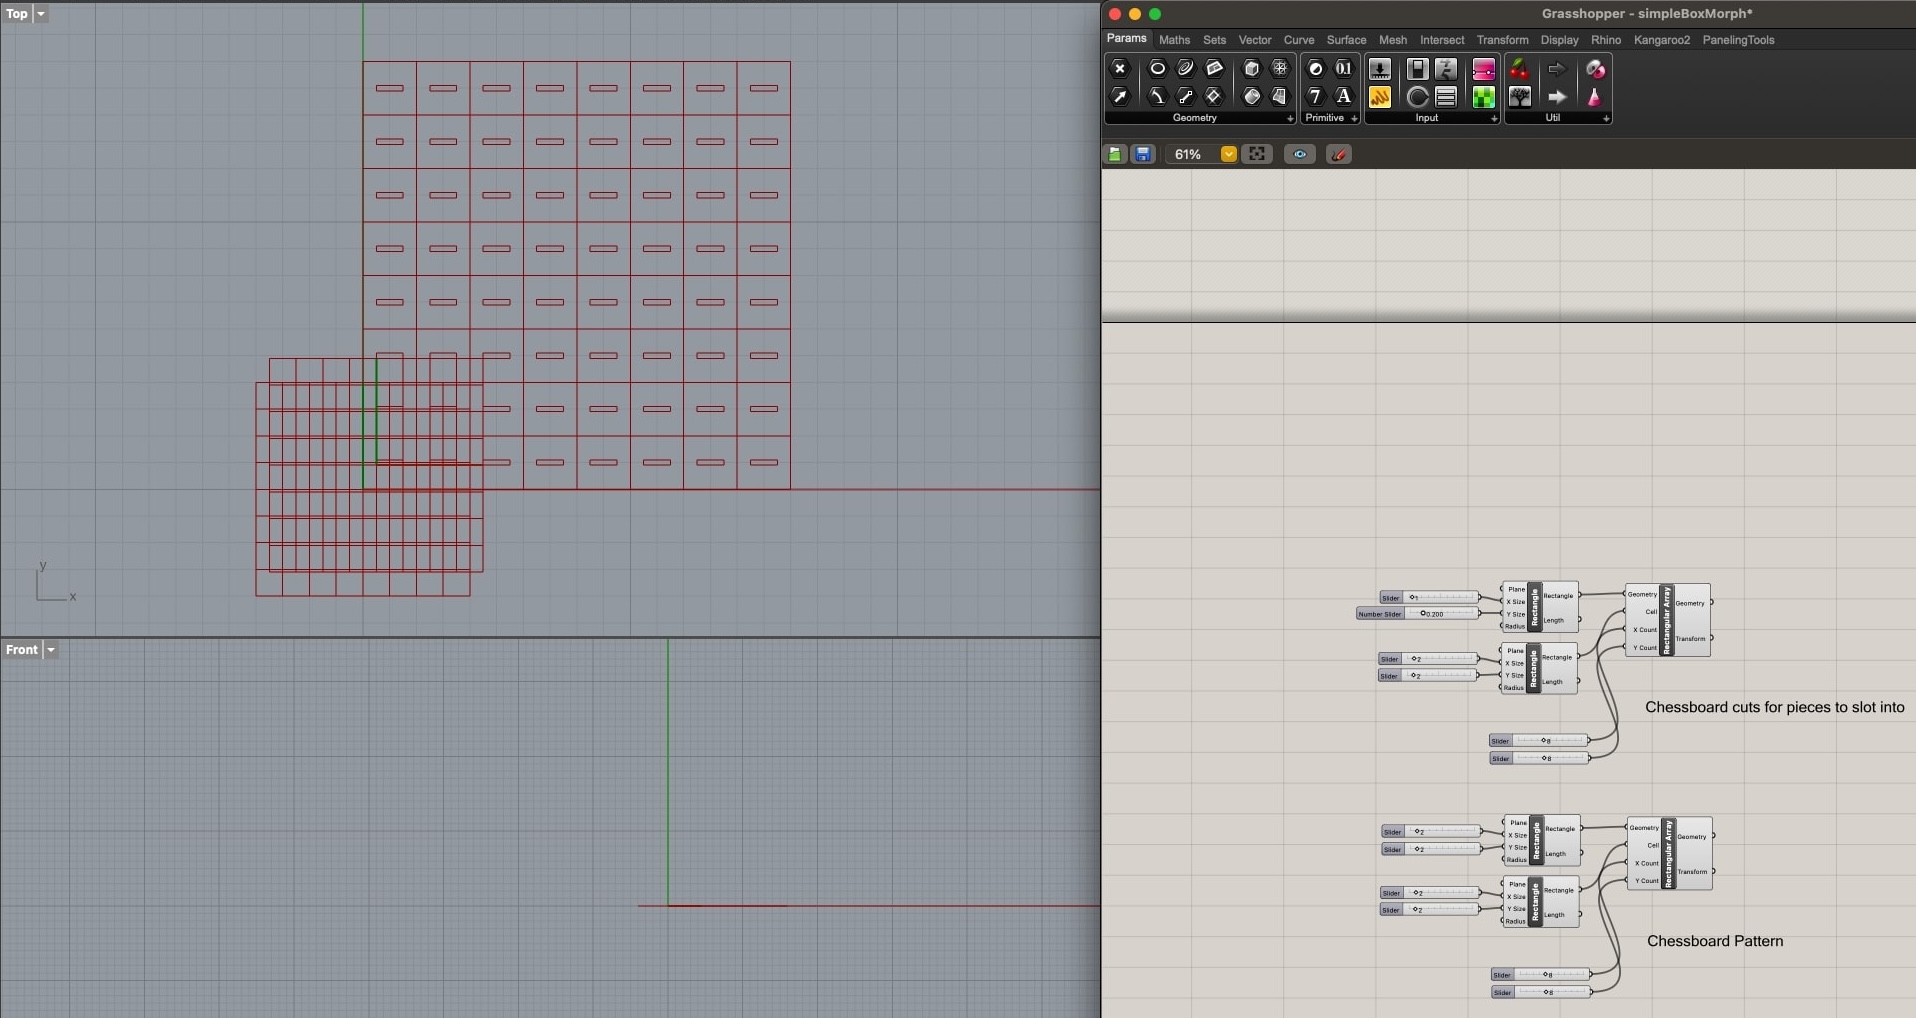
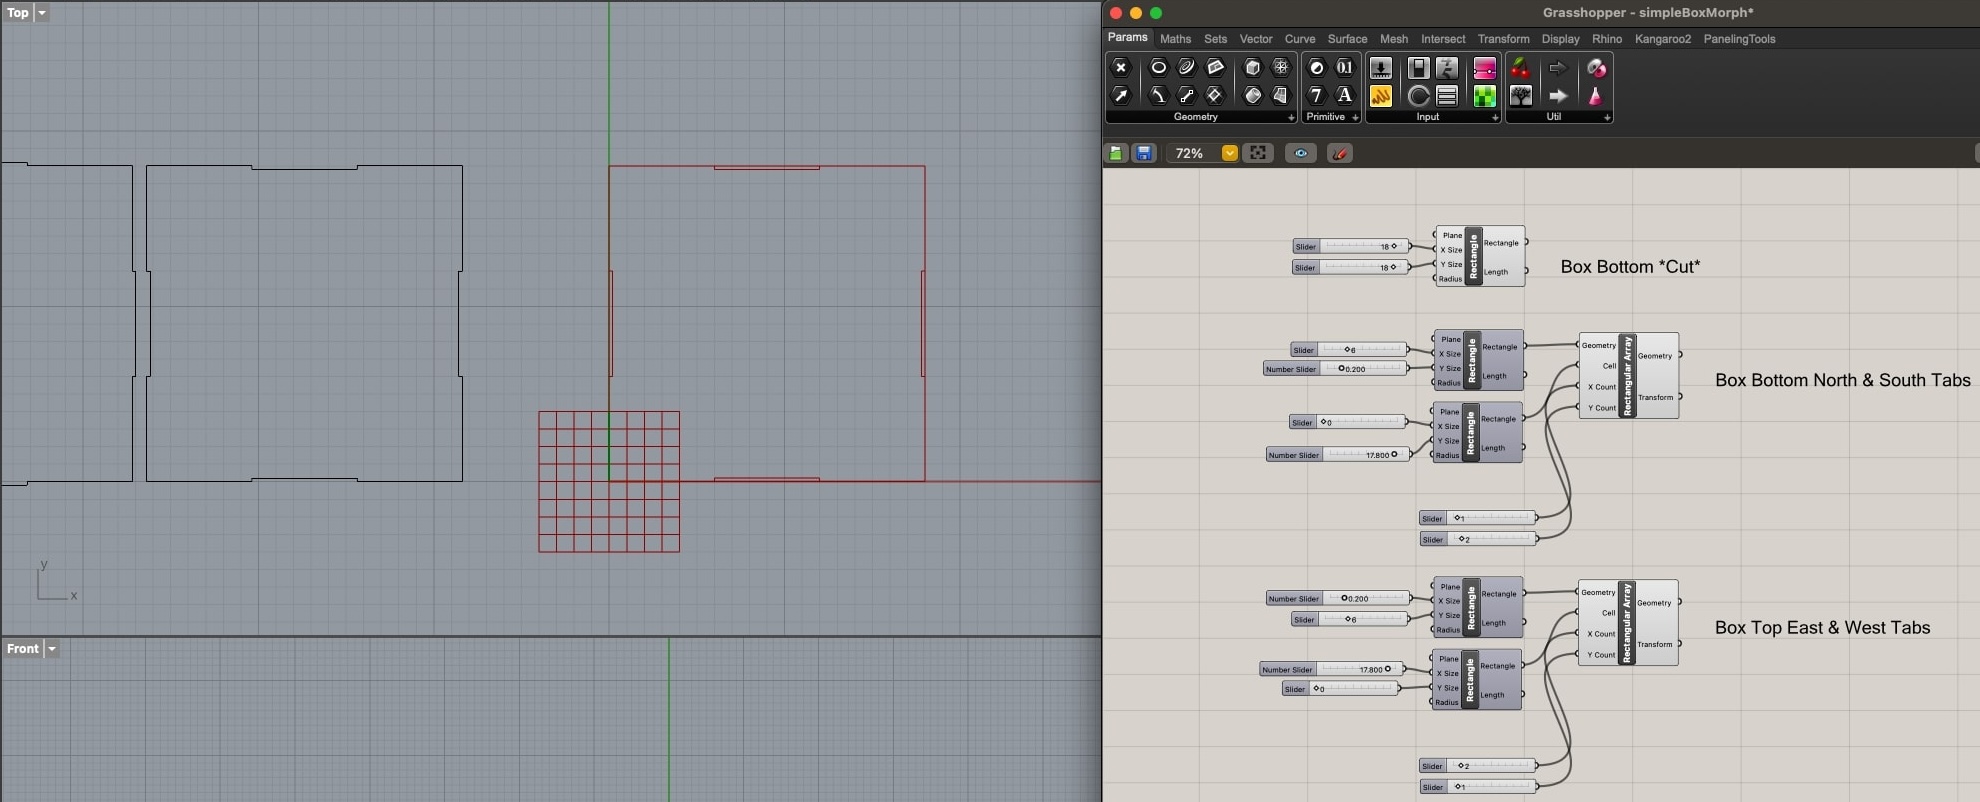
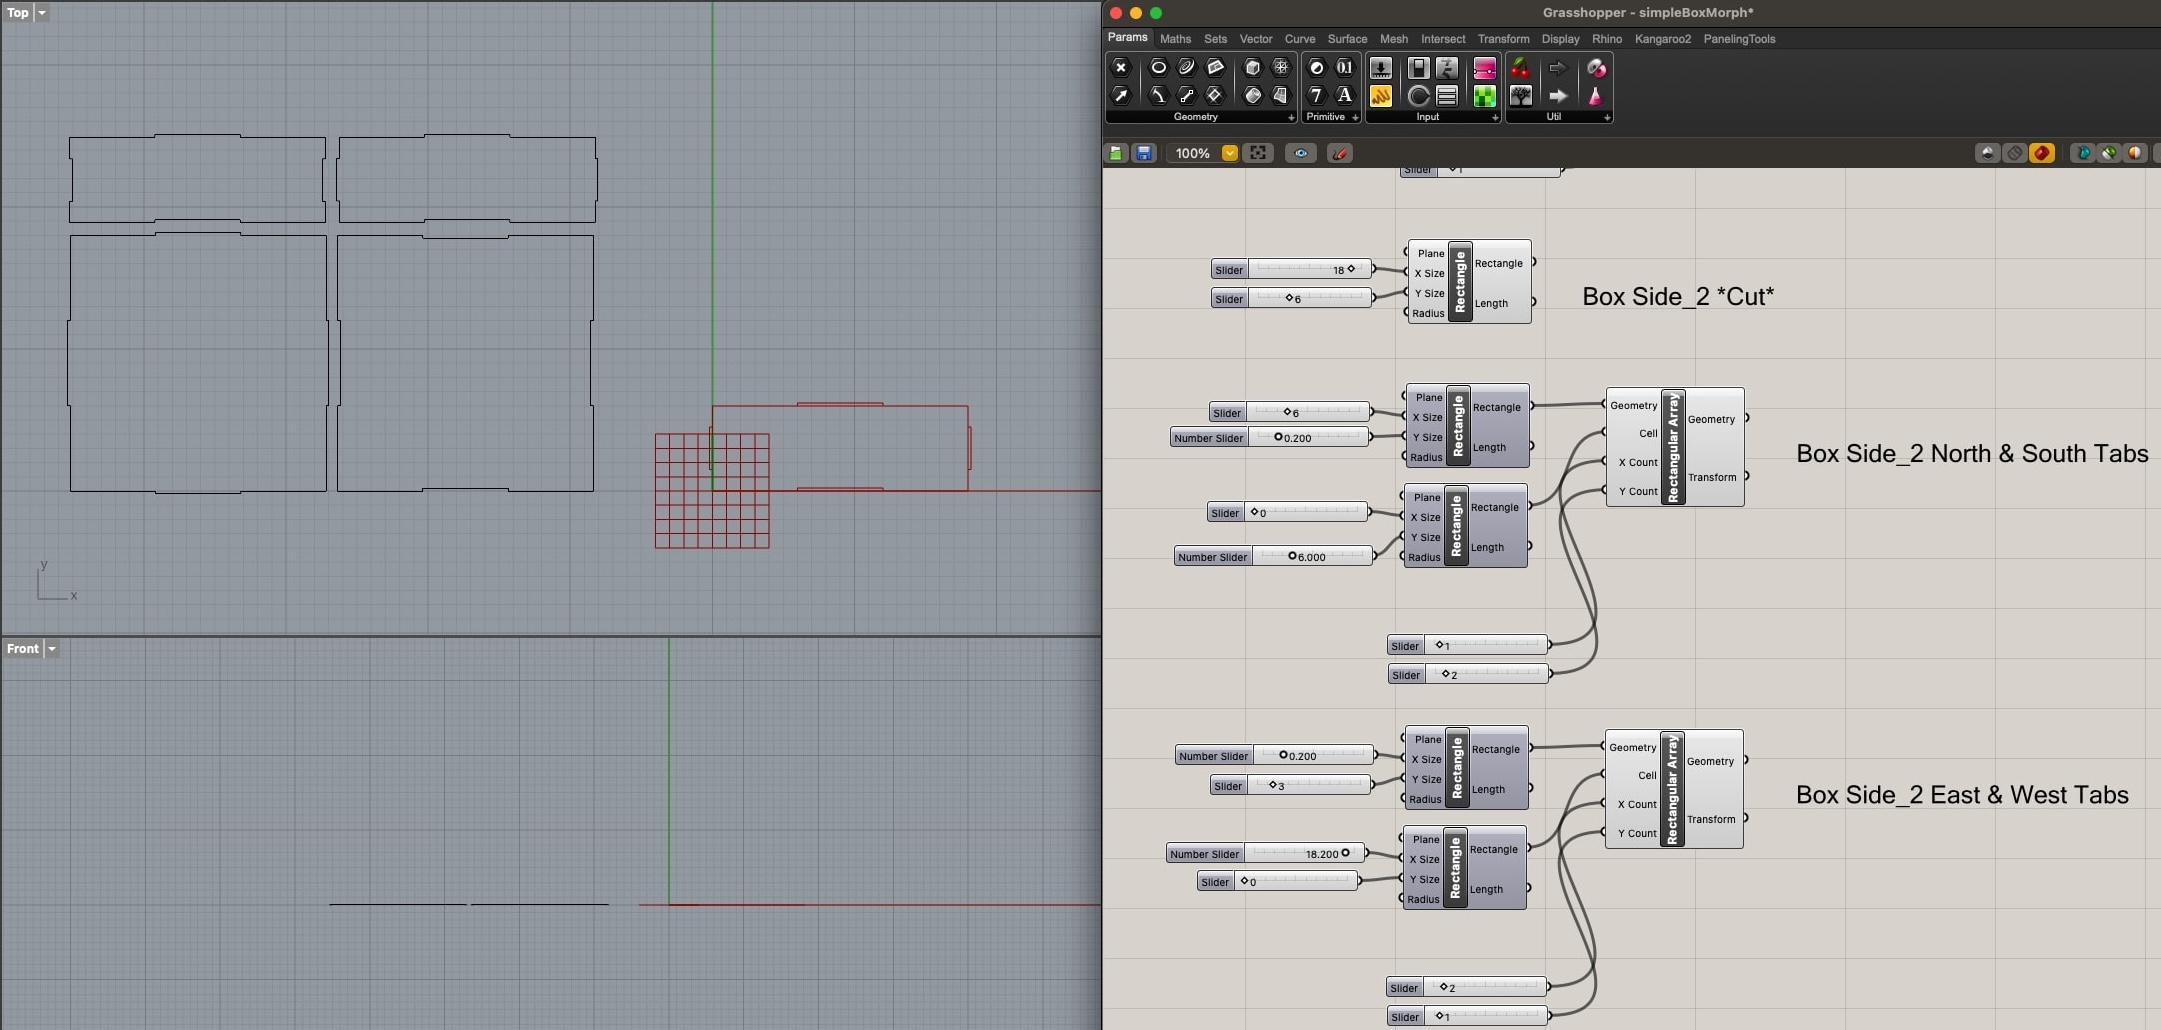
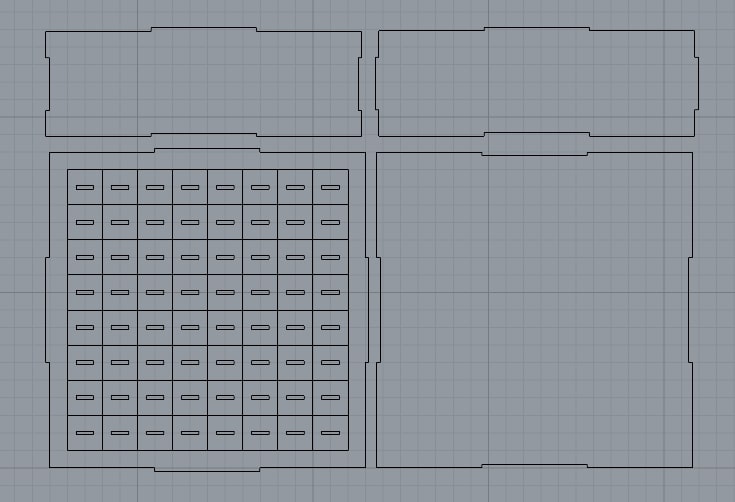
The first thing I wanted to tackle was the chess pattern and box itself, since that was more straightforward compared to the individual chess pieces that would need some tweaking in Rhino.
I am anticipating making the tabs larger for a better fit with the box pieces, but that is a relatively simple edit with my Grasshopper definition where I can increase the tab widths.
I found that the RectangularArray component in Grasshopper to be extremely useful for creating grids and evenly spaced tabs!
As I mentioned earlier, the chess pieces themselves needed to be further refined in Rhino. However, I did create some of the base elements like the tab, stem, and divider of each piece in Grasshopper so it was easier to make similar parts.
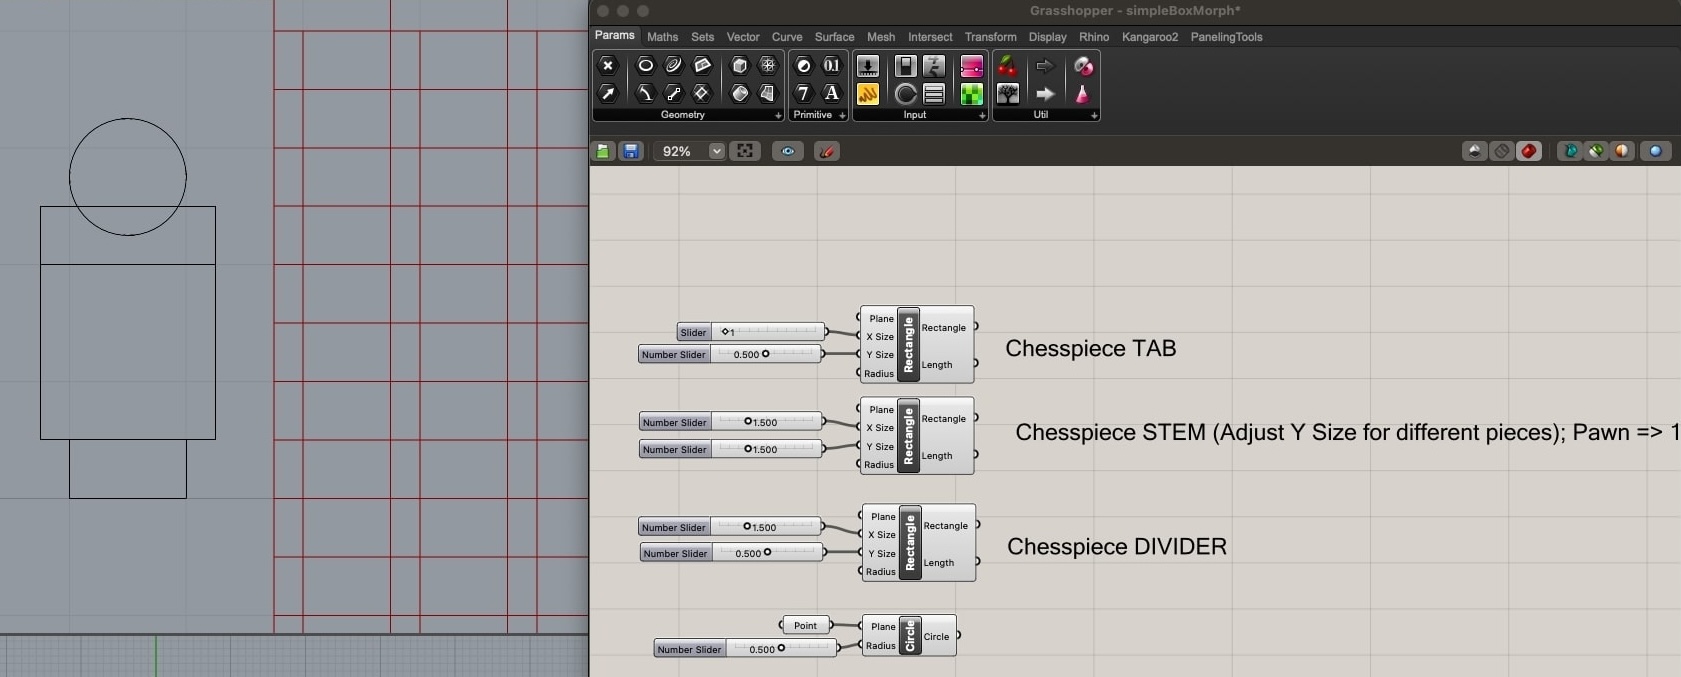
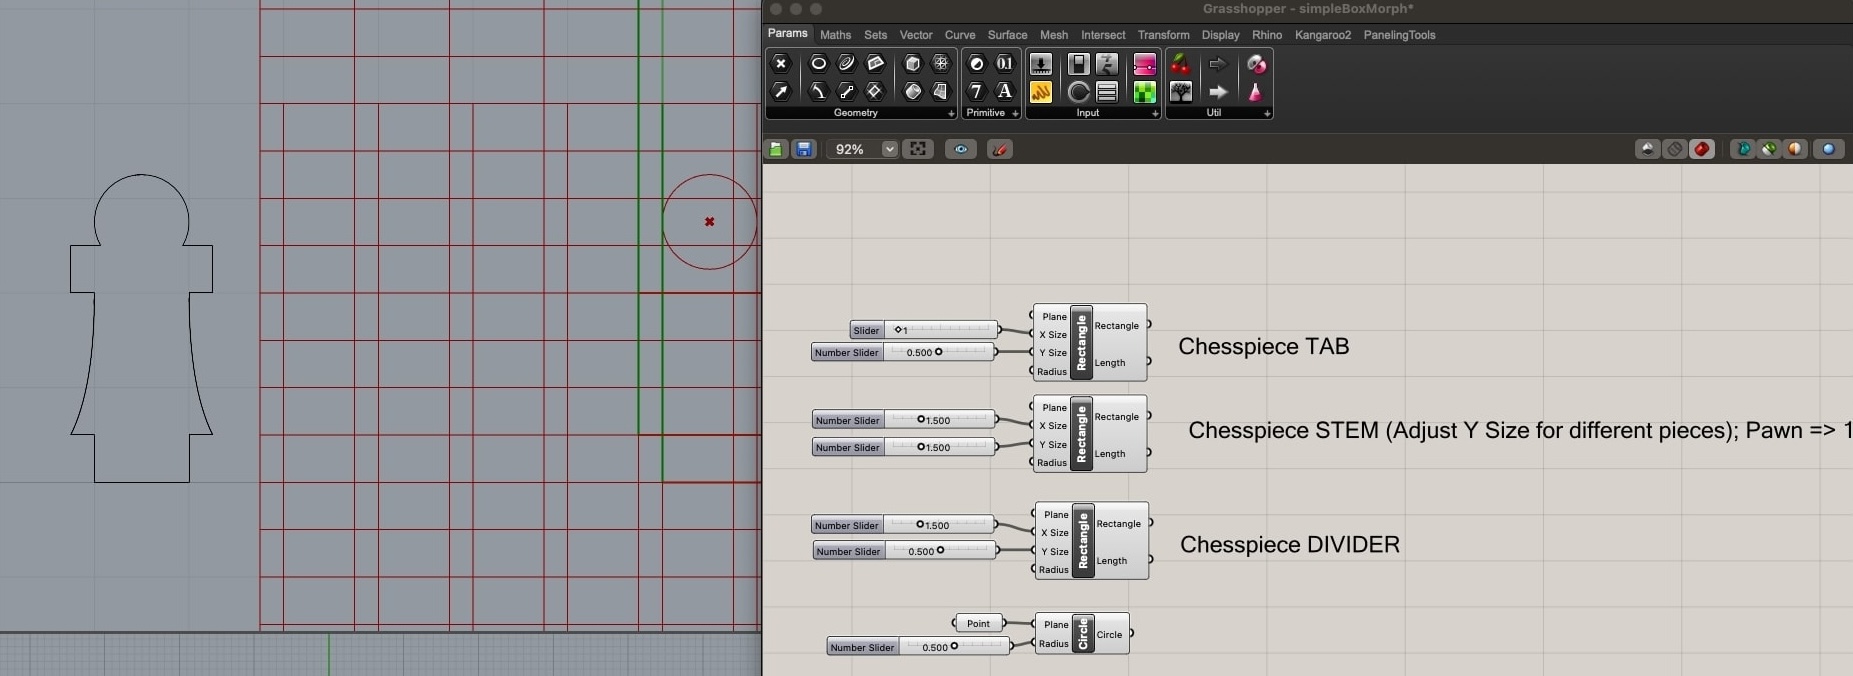
I adjusted the length of the stem for different chess pieces and refined the shape using Curve and CurveBoolean.
After baking and refining all of my pieces, I exported them as vectors and imported them into Adobe Illustrator. I ended up making 2 versions of the chess board pattern because I was not sure what settings to use for engraving cardboard (or if it was even possible). After some duplication and adjusting of the varying pieces on to my cardboard sizes, I was ready to head to The Mill and cut out my pieces!
Phase 3: Test Prints & Engraving
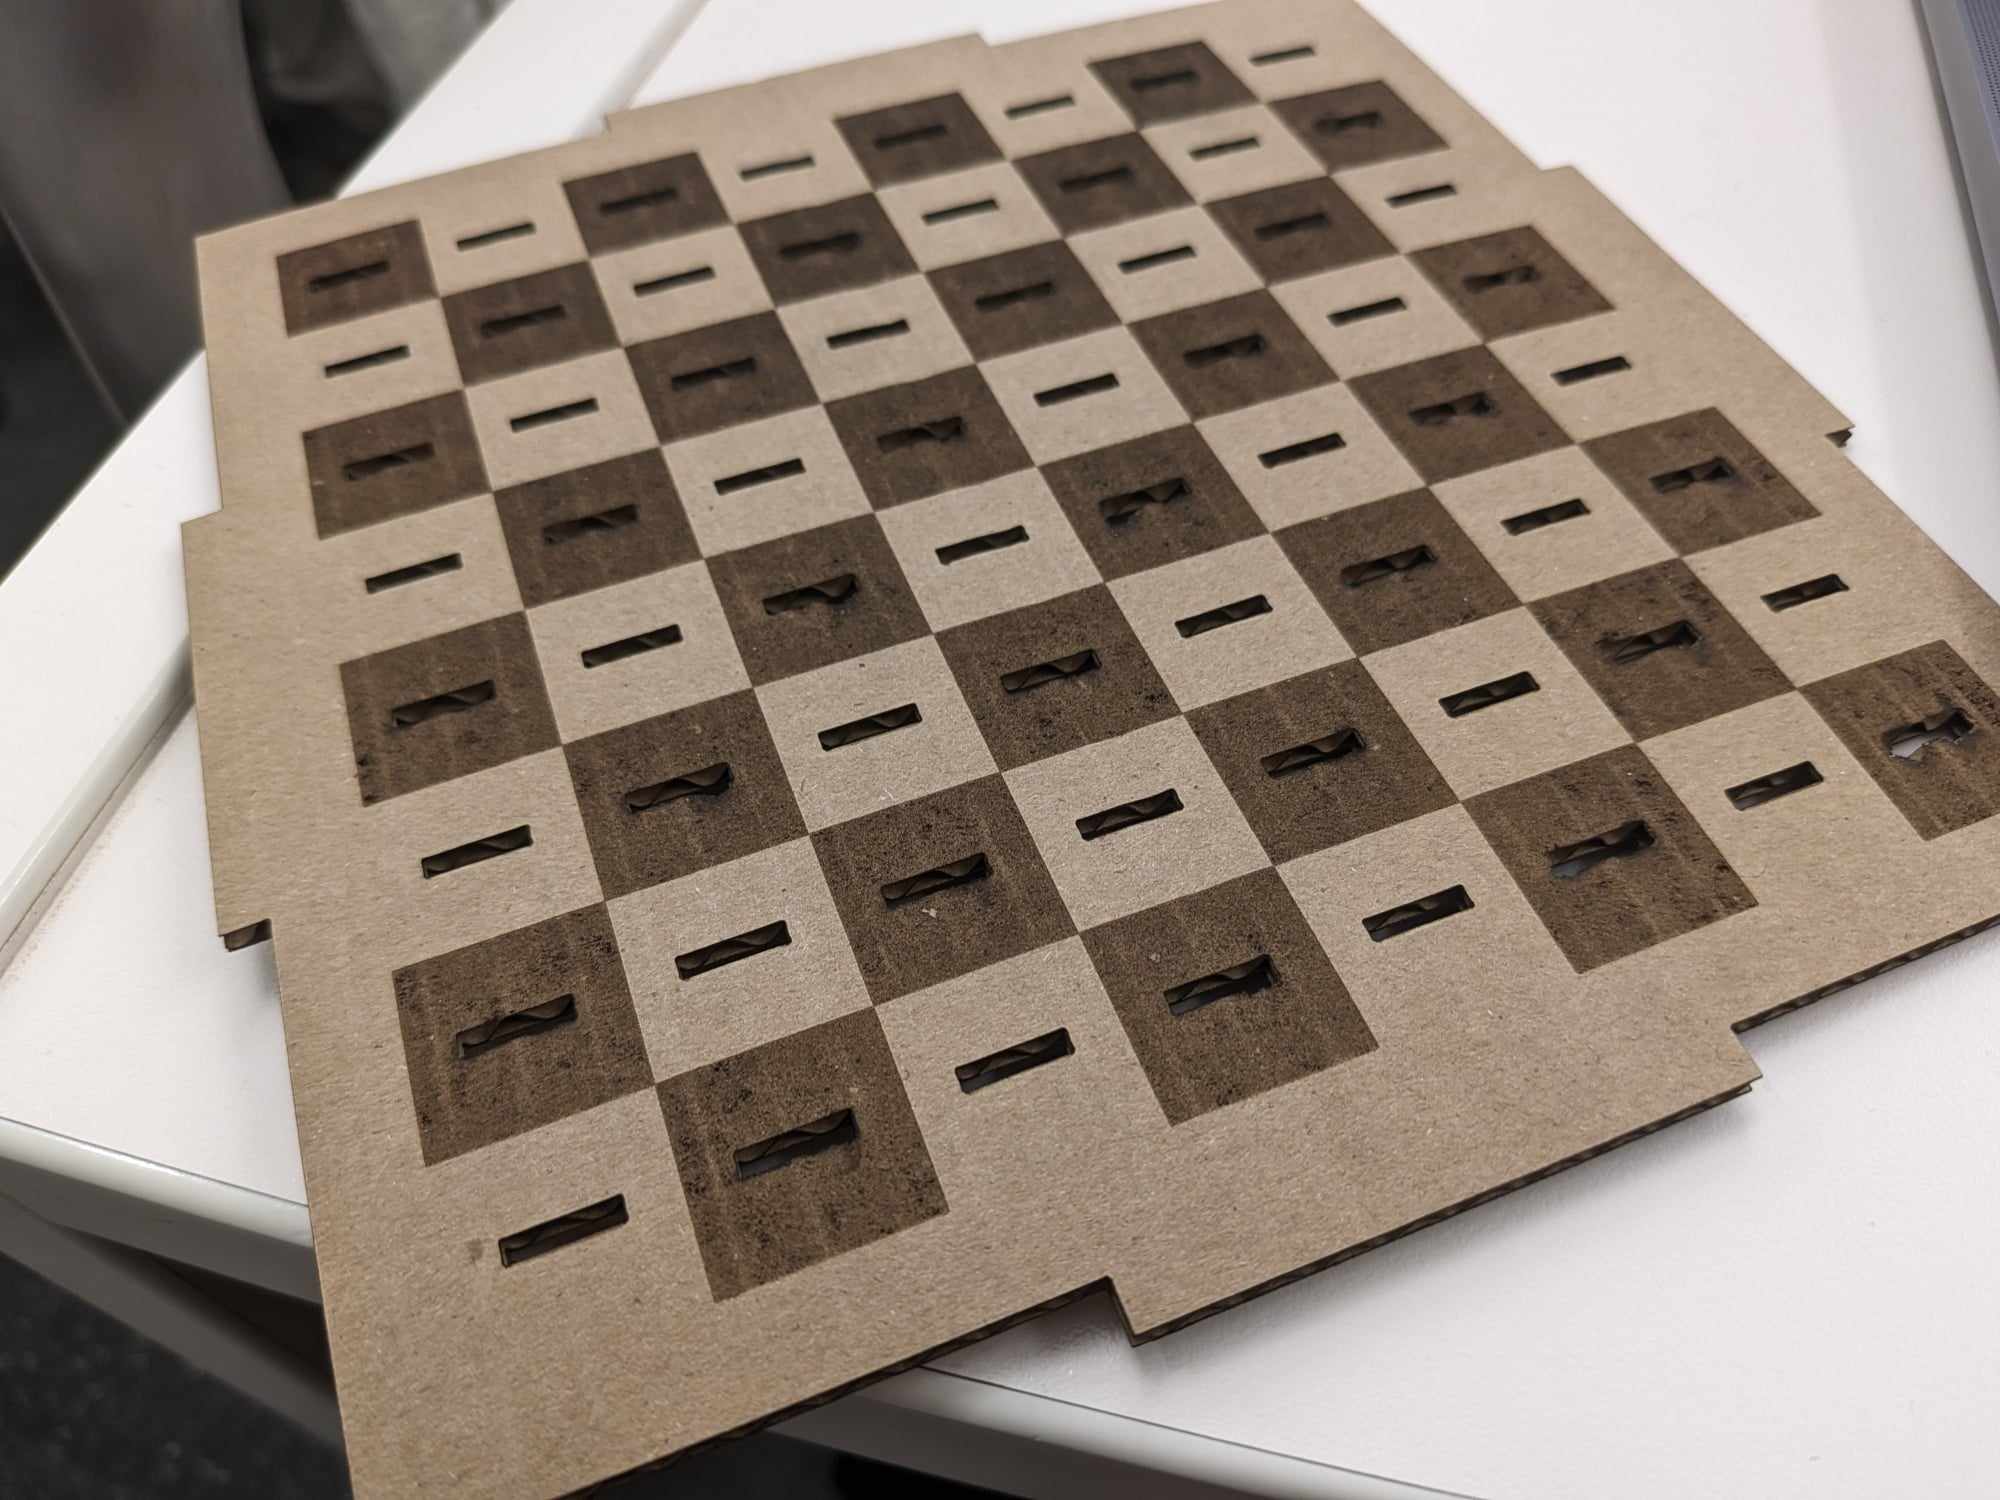
The first thing I wanted to do was make a few test cuts and test engraving with the laser cutter, since I have never tried engraving cardboard before.
I ended up using 50% speed, 25% power, 50% frequency with the Raster setting for the engraving. Looking back, I could have used even less power since I noticed the integrity of the engraved portions start to wear out after cutting out the slots for the tabs.
For the regular cuts, I defaulted to the settings I used for my last project: I ended up using 25% speed, 100% power, and 50% frequency.
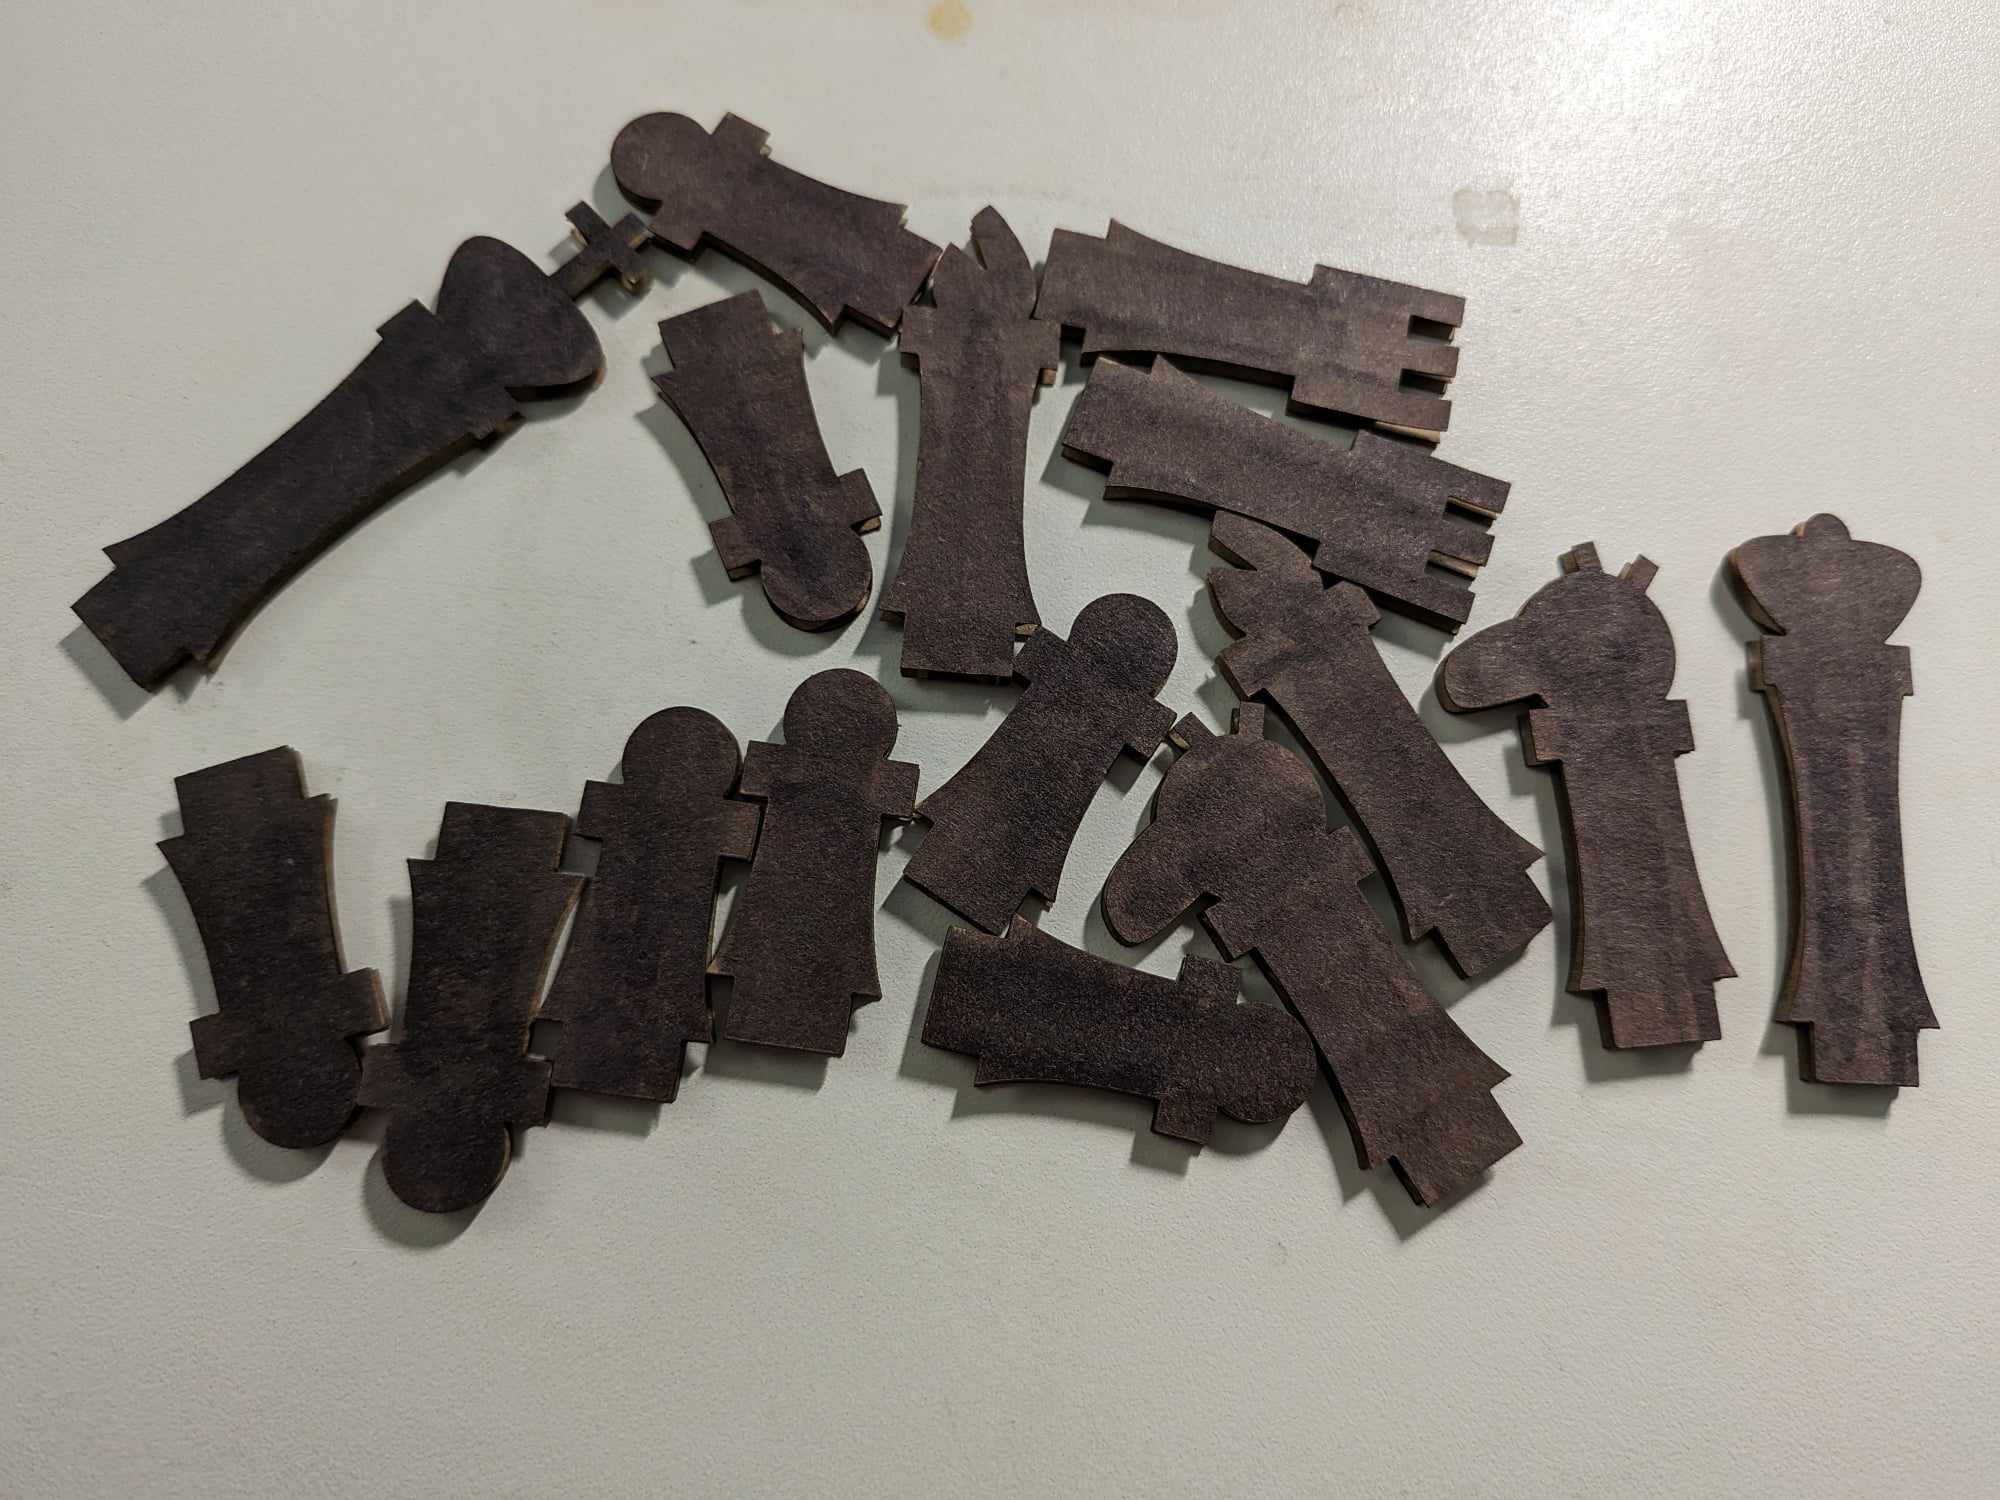
I ended up not engraving the chess pieces as they have very small parts that may be destroyed of weakened due to the engraving process. Therefore, I would use a grey marker to color in half of the chess pieces instead!
One mistake I did end up making was with my box slots. I ended up making them the exact same size as my tabs, so my cardboard pieces slipped out very easy! I ended up having to go back to my Grasshopper file and making the slots 2mm smaller to ensure a snug fit for my pieces to stick together.
Phase 4: Cutting Final Pieces & Finishing Touches
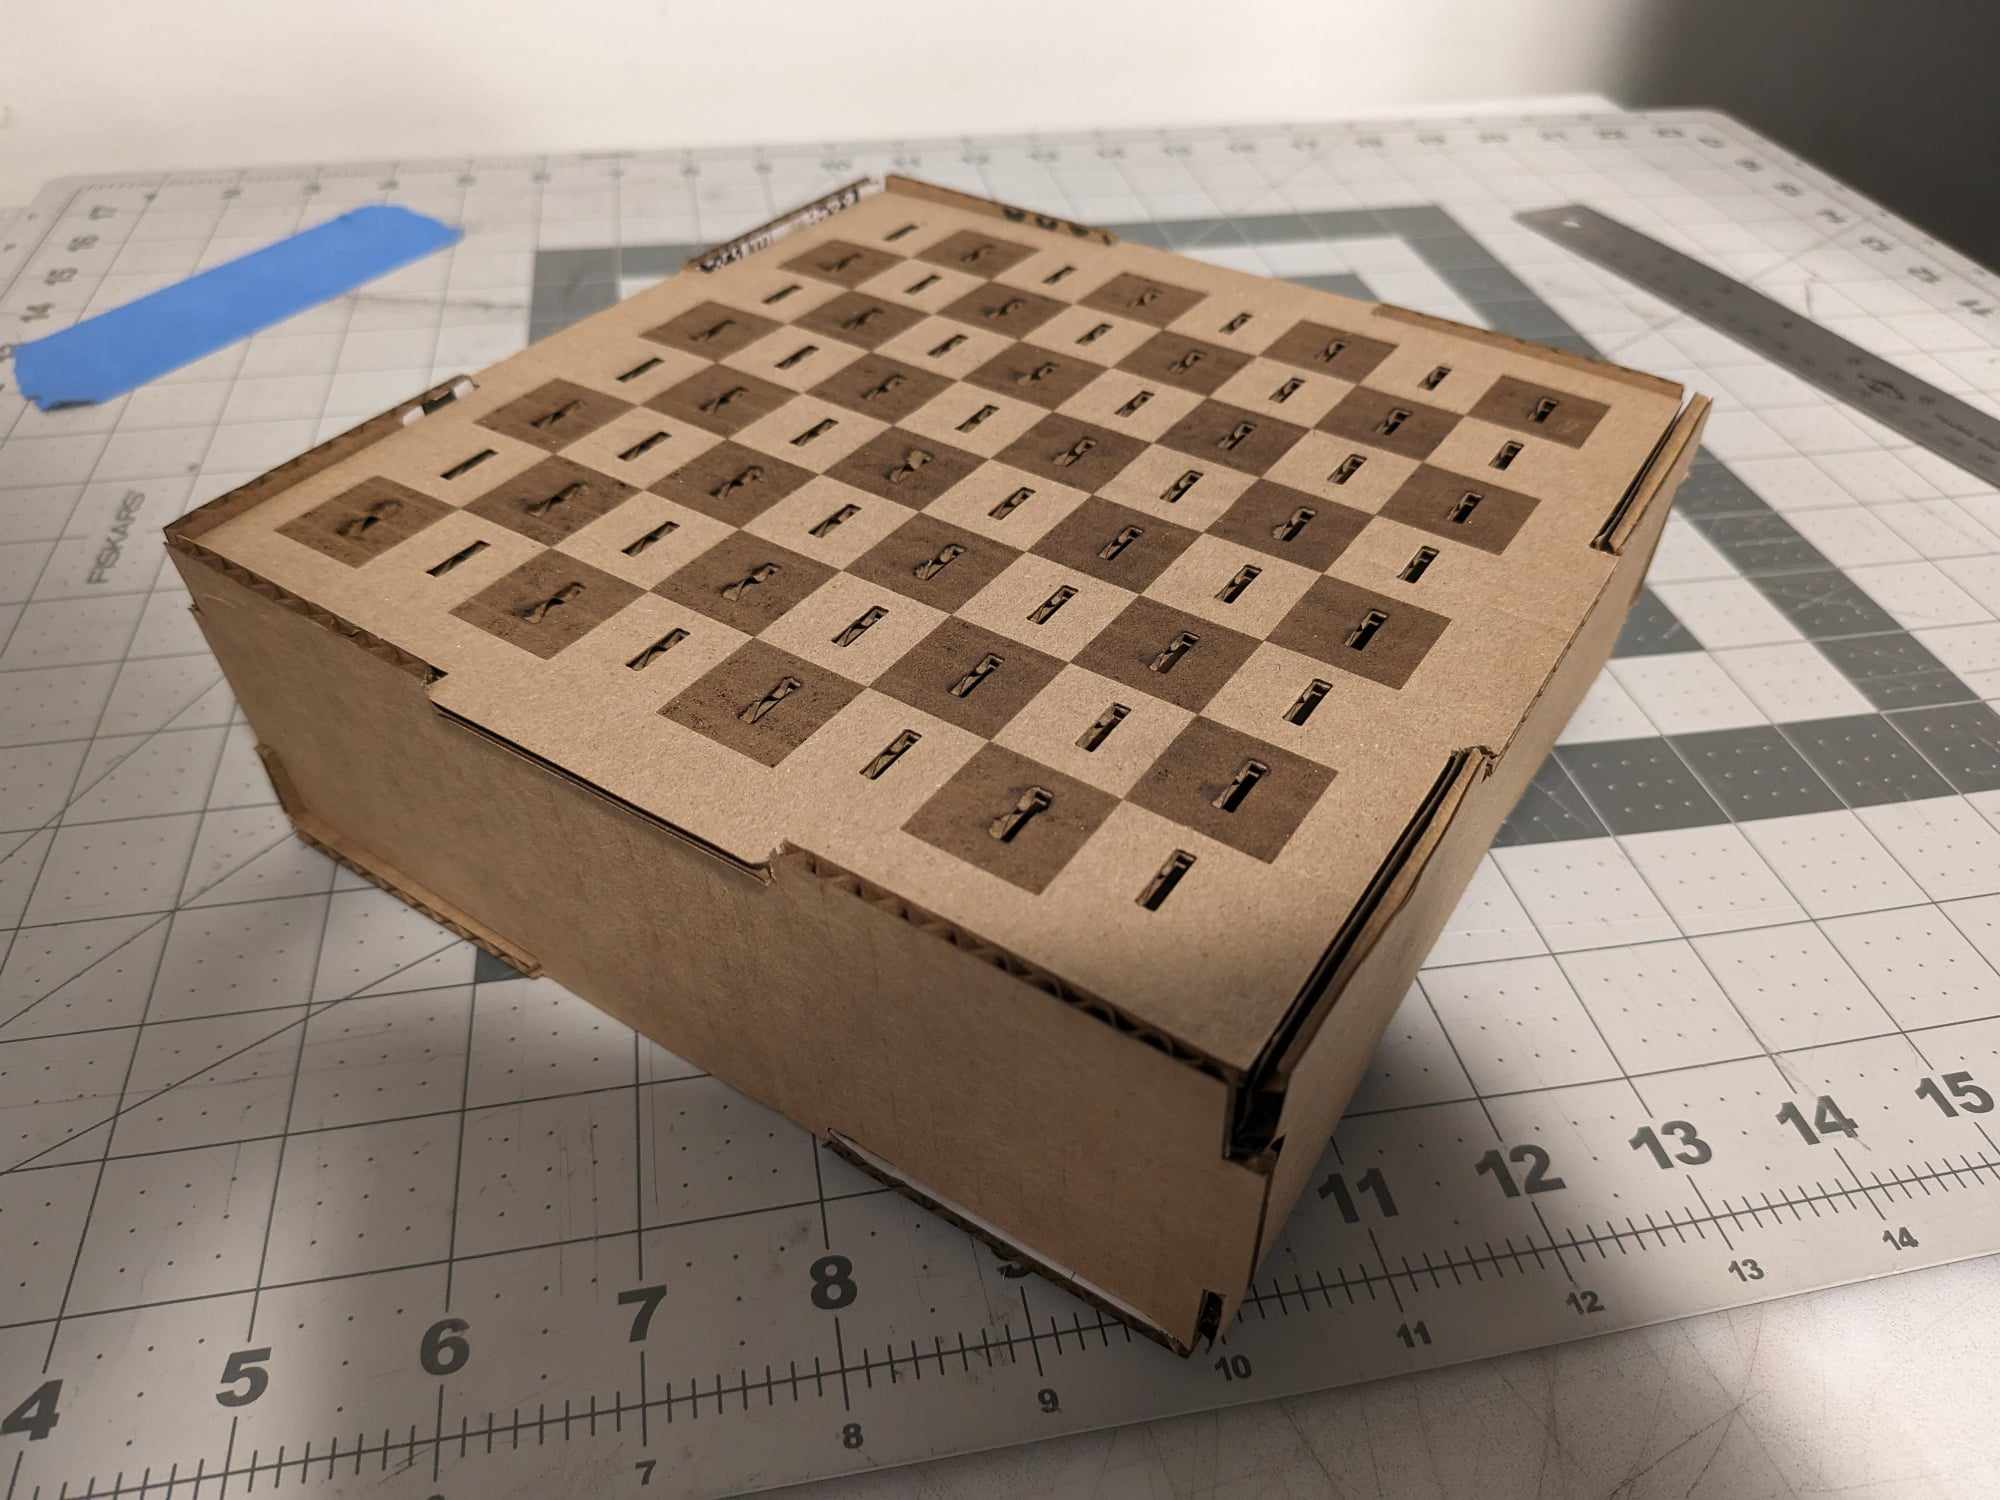
After making my Grasshopper adjustments, I cut out my final pieces and assembled the chess box itself.
To be fair... the fit was not as seamless as I had hoped (most likely due to the varying cardboard types I used again). However, I was out of cardboard to make any additional pieces and decided to make this box work as best as I could.
I also added some finishing touches and colored half of the chess pieces with a grey marker.
Phase 5: Final Product & Reflection
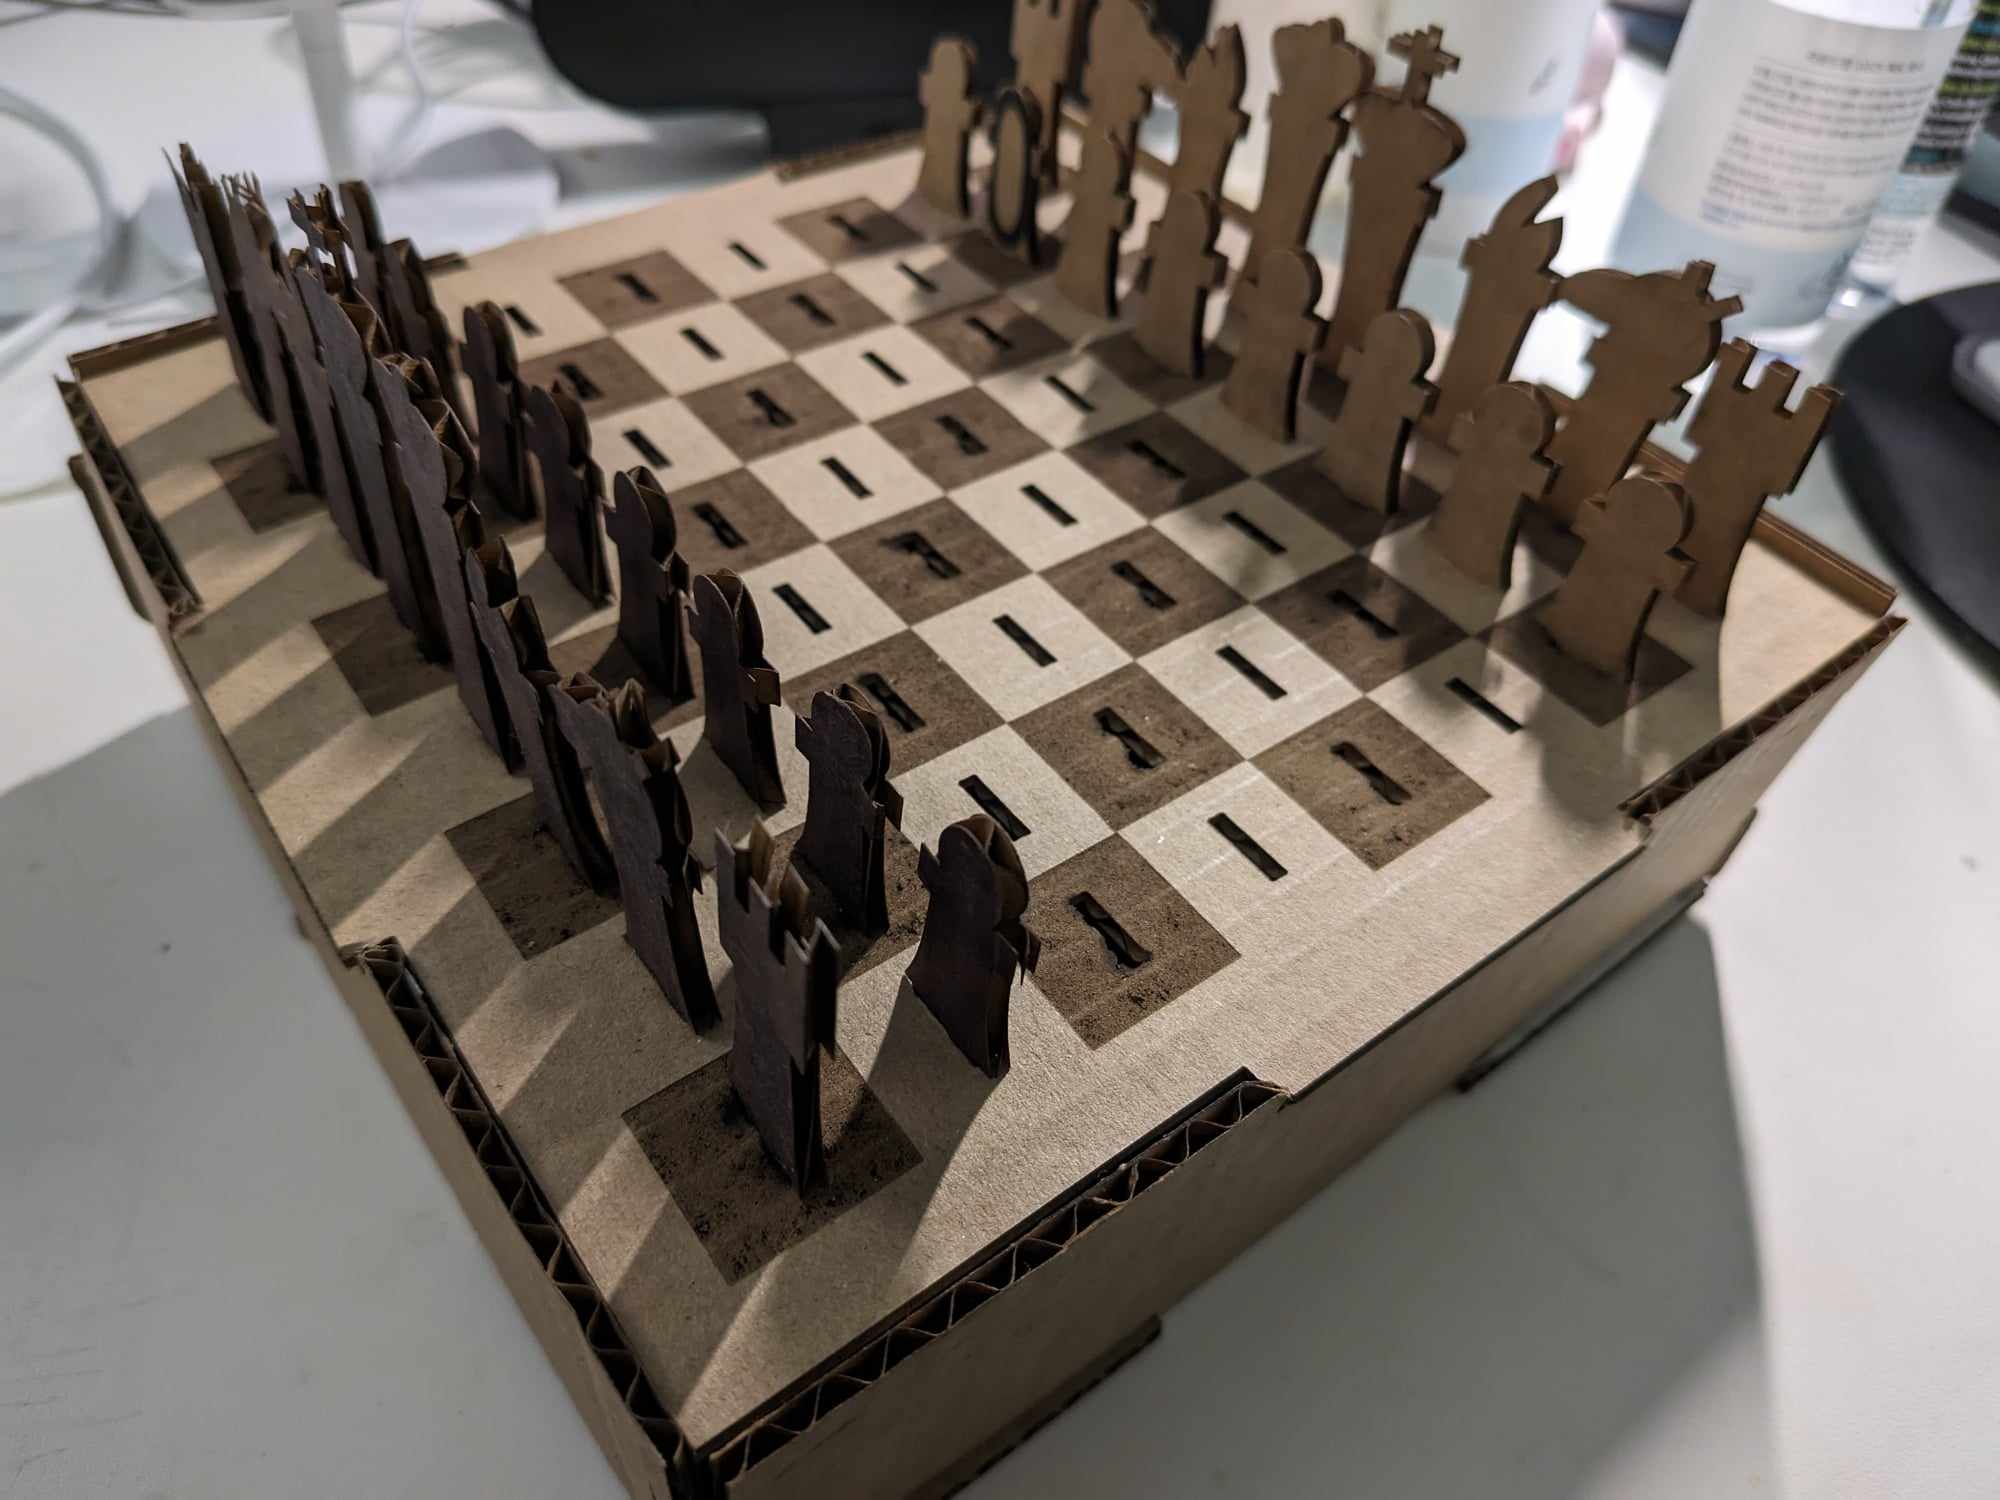
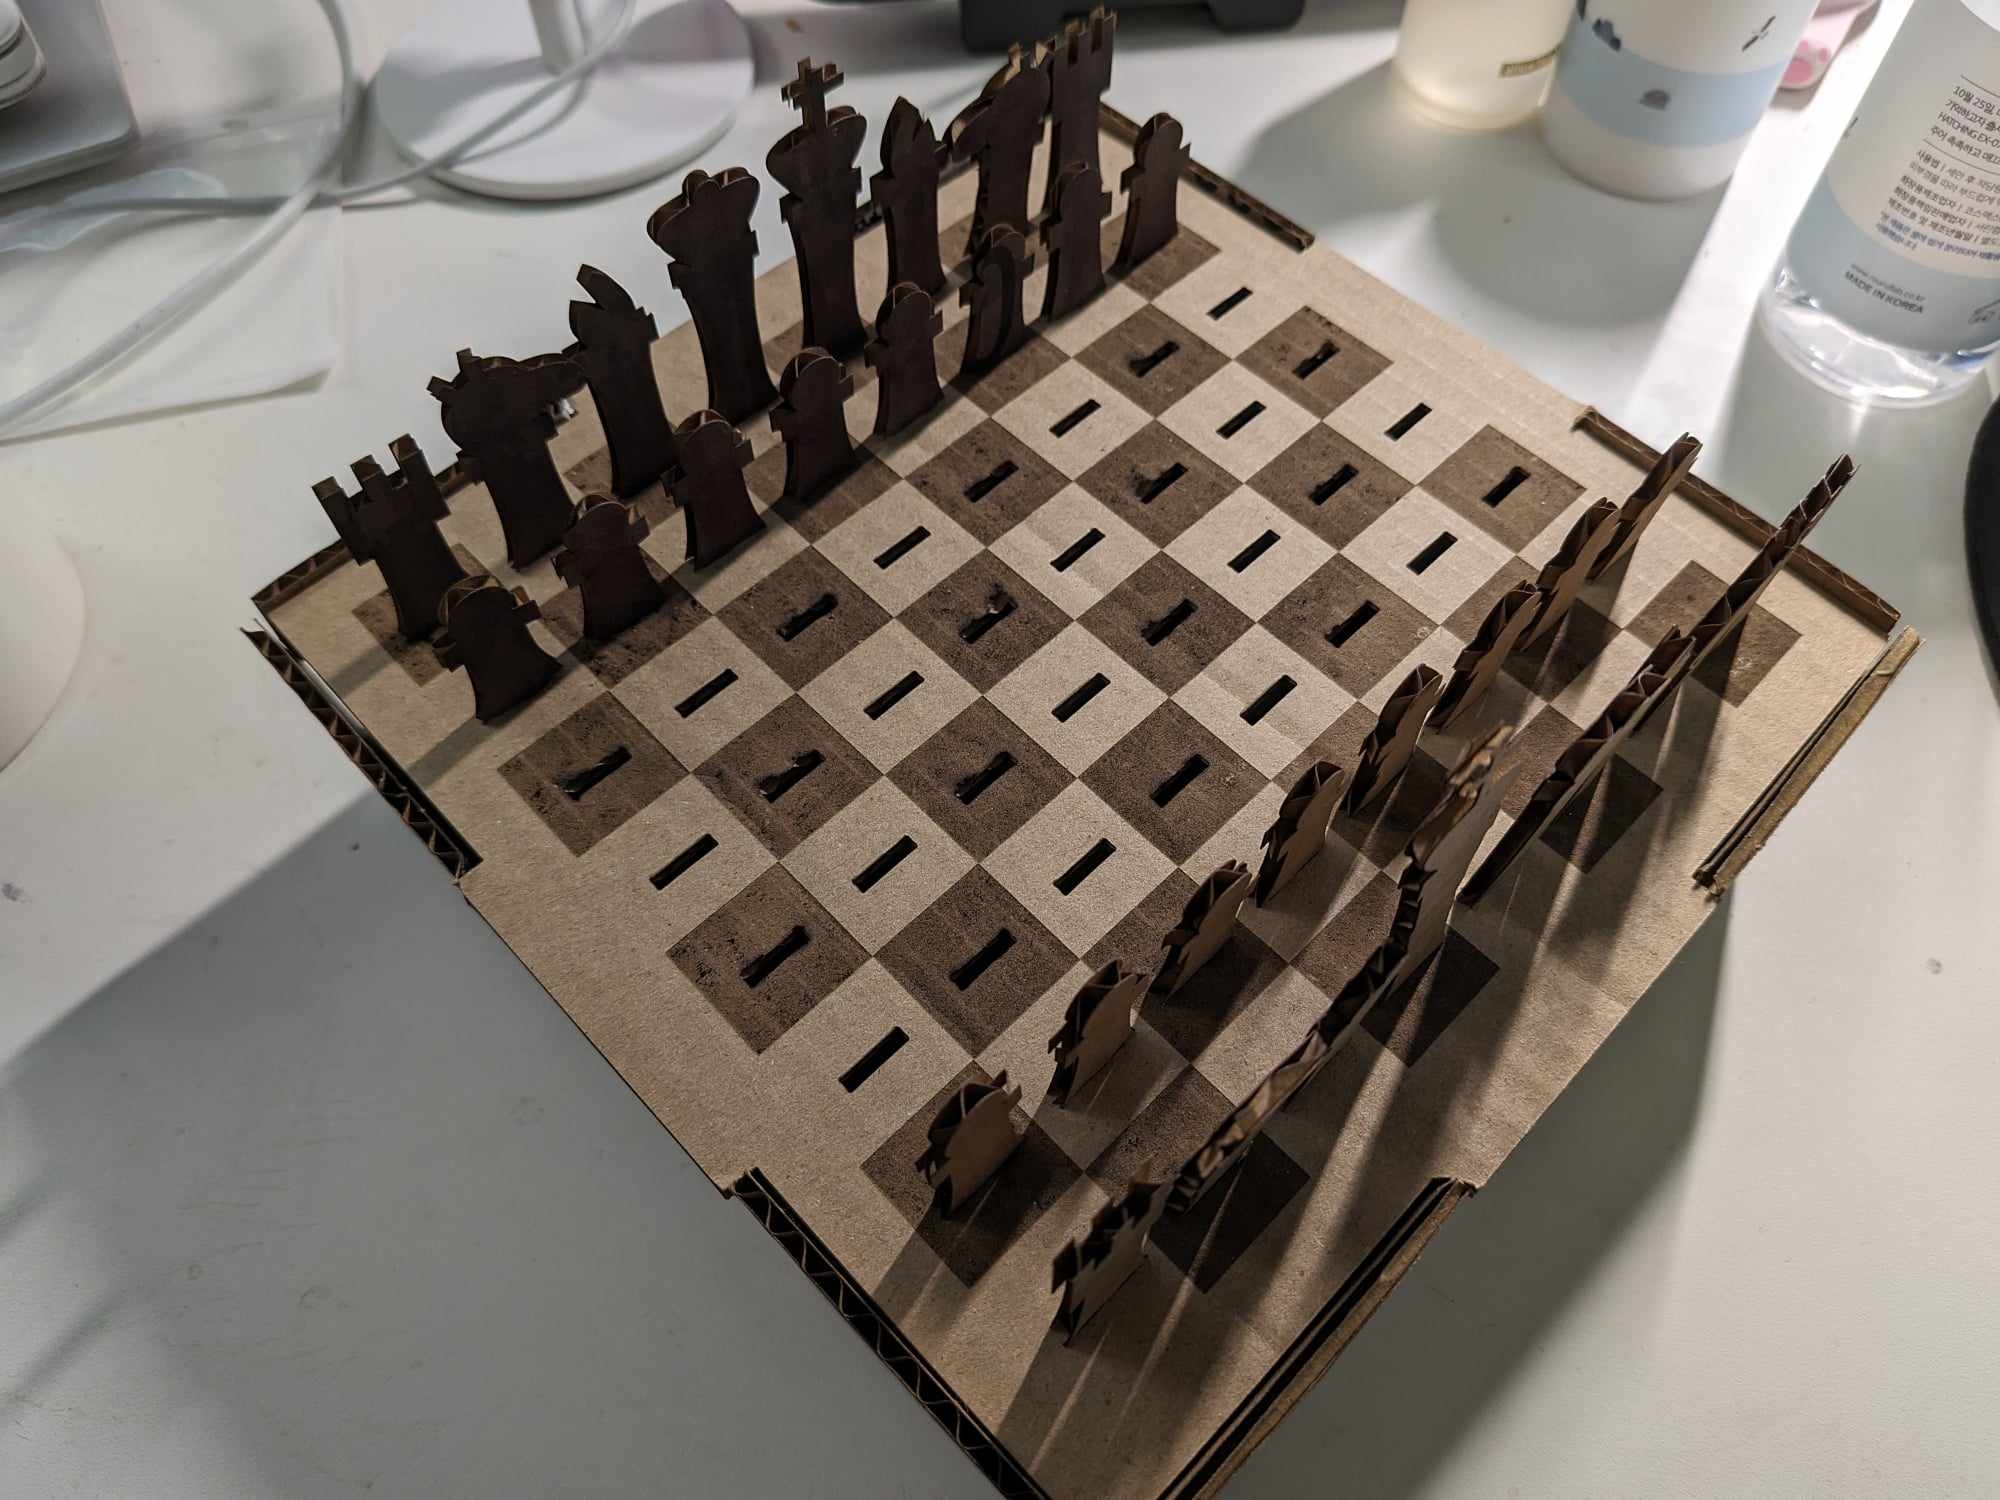
Overall, this project really forced me to learn how to use Grasshopper and Rhino. I must admit that I don't particularly enjoy using Grasshopper and Rhino from this project, but I do understand the capabilities of the tools. I look forward to practicing more with these tools in order to improve, but for more simple pieces, I may turn back to using more simple interfaces for vectors (like Adobe Illustrator or Cuttle).
Reflecting on my final product, I realized at the VERY end that I flipped the check pattern by accident T^T. I fixed the Adobe Illustrator file, so anyone who wants to make this in the future won't have an incorrect pattern like mine does!